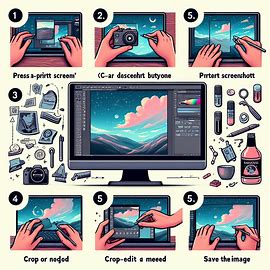
Capturing screenshots on your PC or laptop can be incredibly useful for a variety of reasons, whether you’re saving important information, troubleshooting technical issues, or sharing something interesting with friends and colleagues. This comprehensive guide will walk you through different methods to take screenshots on various operating systems and software tools, ensuring you have the skills needed to capture exactly what you need.
Understanding the Basics
What is a Screenshot?
A screenshot is a digital image of what is visible on your screen. It captures everything displayed, including open applications, icons, and the taskbar. Screenshots can be saved as image files and shared or used in various ways.
Why Take Screenshots?
Screenshots are useful for:
- Documentation: Recording steps in a process or saving important information.
- Troubleshooting: Showing technical issues to support teams.
- Sharing: Sending visuals to friends, colleagues, or social media.
- Education: Creating tutorials and guides.
Taking Screenshots on Windows
Windows offers several built-in methods to capture screenshots, each with its advantages.
Using the Print Screen Key
Full Screen Capture
- Press the `Print Screen` (PrtScn) key: This captures the entire screen.
- Paste the screenshot: Open an image editor like Paint, press `Ctrl + V` to paste, and save the file.
Active Window Capture
- Press `Alt + Print Screen`: This captures the active window.
- Paste and save: As above, paste into an image editor and save.
Using Snipping Tool
The Snipping Tool allows for more precise screenshots.
- Open Snipping Tool: Search for it in the Start menu.
- Select a mode: Choose from Free-form, Rectangular, Window, or Full-screen snip.
- Capture and save: Drag to capture the desired area, then save the image.
Using Snip & Sketch
Snip & Sketch is a more advanced tool available on Windows 10 and later.
- Open Snip & Sketch: Search for it in the Start menu.
- New snip: Click “New” to start a new screenshot.
- Capture: Choose the snip type (Rectangular, Freeform, Window, Fullscreen).
- Annotate and save: Edit, annotate if needed, and save the screenshot.
Using Windows Game Bar
Ideal for gamers, the Windows Game Bar captures screenshots and recordings.
- Open Game Bar: Press `Win + G`.
- Capture screenshot: Click the camera icon or press `Win + Alt + PrtScn`.
- Find your screenshot: Saved in the Videos/Captures folder.
Taking Screenshots on macOS
Mac users also have several built-in tools for taking screenshots.
Using Keyboard Shortcuts
Full Screen Capture
- Press `Command + Shift + 3`: Captures the entire screen.
- Locate the screenshot: Automatically saved to your desktop.
Selected Area Capture
- Press `Command + Shift + 4`: Cursor changes to a crosshair.
- Drag to select area: Capture the selected portion of the screen.
- Locate the screenshot: Saved to your desktop.
Specific Window Capture
- Press `Command + Shift + 4`, then Spacebar: Cursor changes to a camera.
- Click on the window: Capture the specific window.
- Locate the screenshot: Saved to your desktop.
Using Grab
Grab is a utility tool for more specific needs.
- Open Grab: Find it in Applications > Utilities.
- Choose capture mode: Selection, Window, Screen, or Timed Screen.
- Capture and save: Follow the prompts to capture and save your screenshot.
Using Preview
Preview also allows for screenshots.
- Open Preview: Find it in Applications.
- File > Take Screenshot: Choose from the menu.
- Capture and save: Follow prompts to capture and save.
Third-Party Screenshot Tools
In addition to built-in methods, third-party tools offer advanced features for screenshots.
Lightshot
Lightshot is a free, easy-to-use tool.
- Download and install Lightshot: Available from the Lightshot website.
- Use the shortcut: Press `Print Screen` (configurable) to activate.
- Select area: Drag to capture and edit.
- Save or upload: Save locally or upload for sharing.
Snagit
Snagit offers robust features for professionals.
- Download and install Snagit: Available from TechSmith’s website.
- Open Snagit: Configure settings as needed.
- Capture: Choose from various capture modes.
- Edit and save: Use Snagit’s editor to enhance and save your screenshot.
Greenshot
Greenshot is another popular tool.
- Download and install Greenshot: Available from the Greenshot website.
- Use the shortcut: Press `Print Screen` (configurable) to activate.
- Select area: Capture and edit as needed.
- Save or upload: Options to save locally or upload directly.
Tips for Better Screenshots
Use High Resolution
Ensure your screen resolution is high enough for clear, detailed screenshots.
Focus on the Relevant Area
Capture only the necessary part of your screen to keep the screenshot clean and focused.
Edit and Annotate
Use editing tools to crop, highlight, or add text to your screenshots for better clarity and communication.
Organize Your Screenshots
Keep your screenshots organized in folders with clear names to easily locate them later.
Practice Makes Perfect
Regularly practice taking and editing screenshots to become more efficient and improve your skills.
Conclusion
Taking screenshots on your PC or laptop is a simple yet powerful tool for capturing and sharing visual information. Whether you’re using built-in methods on Windows or macOS, or opting for third-party tools, you have a range of options to suit your needs. By understanding and utilizing these methods, you can efficiently capture screenshots for documentation, troubleshooting, sharing, and more.
Leave a Reply